Beranda
/ Diy Picture Wall Ledge / Diy Picture Ledges Handmade Weekly : When i say within budget, i mean $15 per shelf.
Diy Picture Wall Ledge / Diy Picture Ledges Handmade Weekly : When i say within budget, i mean $15 per shelf.
Insurance Gas/Electricity Loans Mortgage Attorney Lawyer Donate Conference Call Degree Credit Treatment Software Classes Recovery Trading Rehab Hosting Transfer Cord Blood Claim compensation mesothelioma mesothelioma attorney Houston car accident lawyer moreno valley can you sue a doctor for wrong diagnosis doctorate in security top online doctoral programs in business educational leadership doctoral programs online car accident doctor atlanta car accident doctor atlanta accident attorney rancho Cucamonga truck accident attorney san Antonio ONLINE BUSINESS DEGREE PROGRAMS ACCREDITED online accredited psychology degree masters degree in human resources online public administration masters degree online bitcoin merchant account bitcoin merchant services compare car insurance auto insurance troy mi seo explanation digital marketing degree floridaseo company fitness showrooms stamfordct how to work more efficiently seowordpress tips meaning of seo what is an seo what does an seo do what seo stands for best seotips google seo advice seo steps, The secure cloud-based platform for smart service delivery. Safelink is used by legal, professional and financial services to protect sensitive information, accelerate business processes and increase productivity. Use Safelink to collaborate securely with clients, colleagues and external parties. Safelink has a menu of workspace types with advanced features for dispute resolution, running deals and customised client portal creation. All data is encrypted (at rest and in transit and you retain your own encryption keys. Our titan security framework ensures your data is secure and you even have the option to choose your own data location from Channel Islands, London (UK), Dublin (EU), Australia.
Diy Picture Wall Ledge / Diy Picture Ledges Handmade Weekly : When i say within budget, i mean $15 per shelf.. Since your picture ledge will be supporting frames and other potentially heavy items, hang it on wall studs for extra security. Hold your ledge on the wall where you want it. Paint or stain the picture ledge shelf and let dry completely. We used the leftover oak wood from the wall we removed in our dining room. If needed, cut your wood to the length you want your shelf to be…our shelves are 8 feet long.
I see lots more picture ledge shelves in our future. And you bet i scoured your past picture ledge posts to find out the dimensions of your ledge. Cut all of your wood pieces to the exact same length. Next learn how to build a picture frame to place on your new shelf: Add a thin line of glue along the bottom edge of the 4 inch piece of wood.
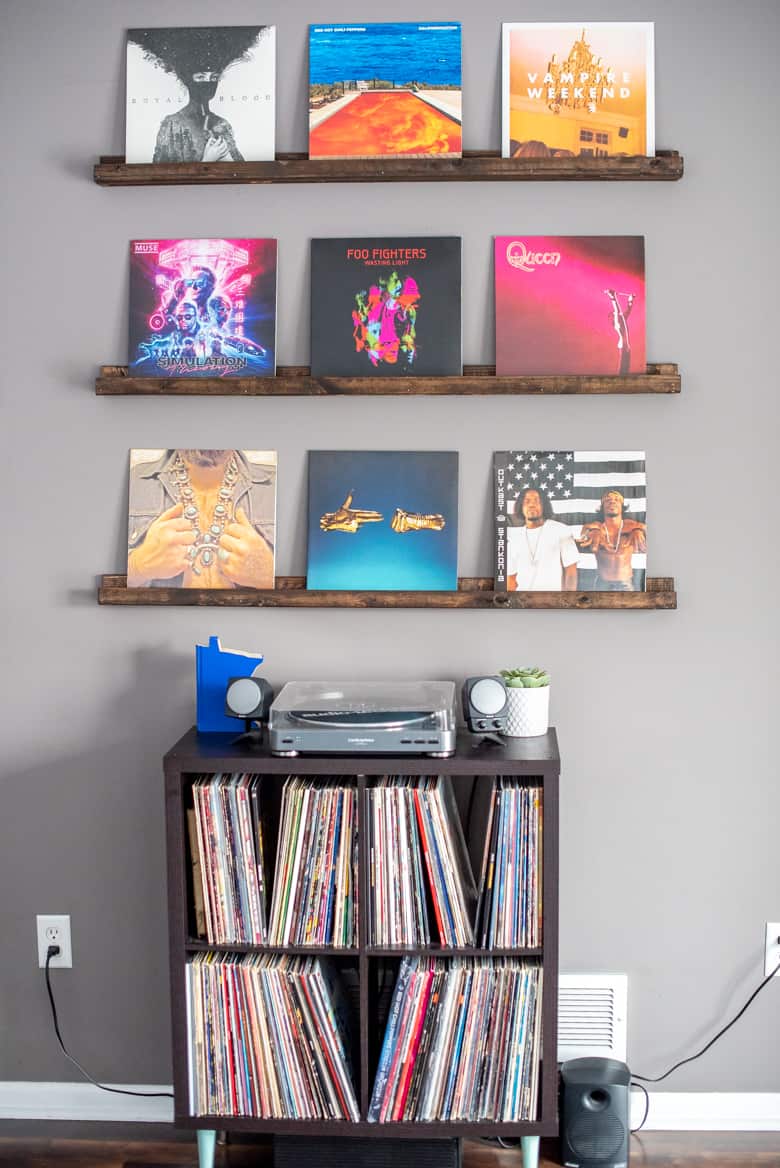
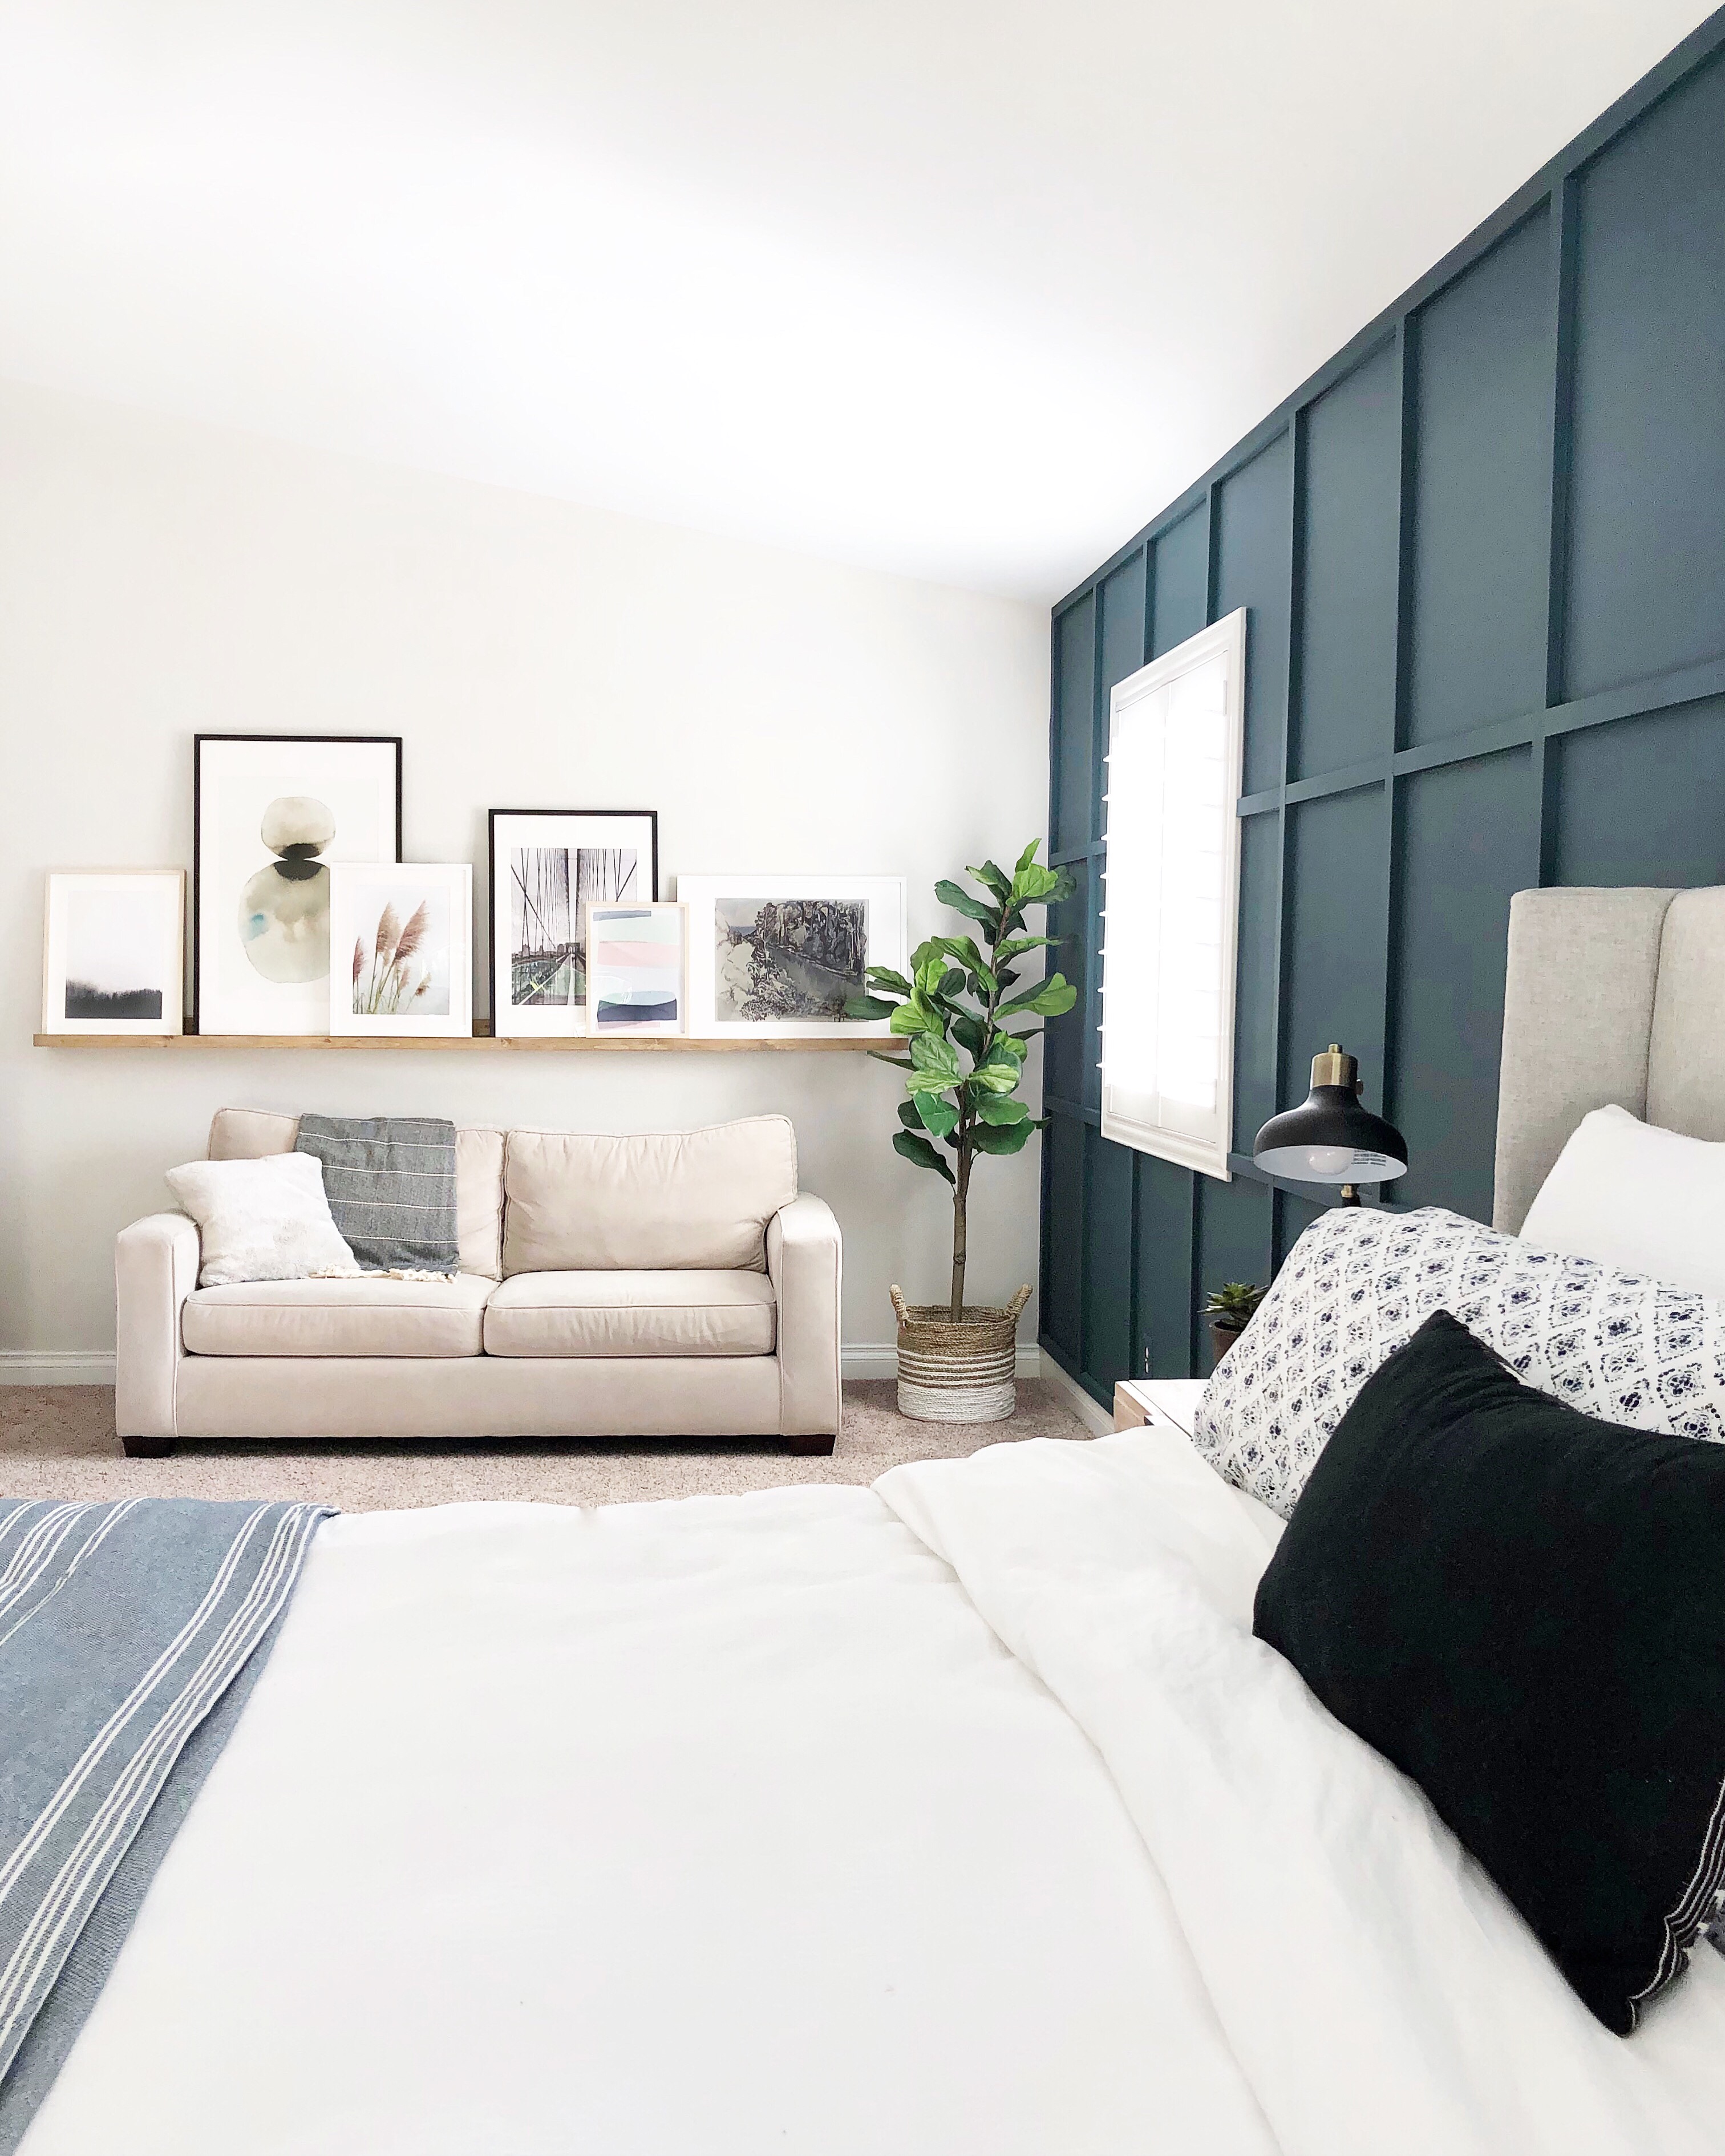
Diy Vinyl Record Wall Shelves Bre Pea from www.brepea.com Use a level to make sure your photo ledge will be. We used 1 x 4s to form the back of the ledge, 1 x 6s to form the bottom of the ledge, and 1 x 2s to form the front of the ledge (which holds all the art in place). Once painted and dry, partially insert screws into previously drilled holes. You can fill up the wall of your living that is right behind the big sofa with this elegant picture frame ledge and display a bunch of your memorable and cute photos on it and thus add oodles of charm and fun to your spaces and that too on your own. Apply wood glue to the back edge of board b and attach to the bottom front edge of board a. Add a thin line of glue along the bottom edge of the 4 inch piece of wood. After it was glued together i secured it with screws. Make this easy diy picture ledge:
We used the leftover oak wood from the wall we removed in our dining room.
The ledges in my dining room cost me less than $20 for all of the materials! When i say within budget, i mean $15 per shelf. To hang, locate the studs in the wall and drill directly through the back boards into the wall. Here's a summary of the supplies needed and the cost. Then my dad came over and we hung the ledge by drilling cabinet screws right into the back of the ledges. I built the diy picture ledge using the exact same steps from the diy bookshelves i built for ben's nursery. You can fill up the wall of your living that is right behind the big sofa with this elegant picture frame ledge and display a bunch of your memorable and cute photos on it and thus add oodles of charm and fun to your spaces and that too on your own. And you bet i scoured your past picture ledge posts to find out the dimensions of your ledge. They are super easy to make out of the wooden planks with. In this video i build two shelves for around $9. Secure with several nails or wood screws. We needed 2 shelves that were 62 inches long. Once painted and dry, partially insert screws into previously drilled holes.
Once dry, use the 2 1/2 to 3 inch screws with the power drill to secure onto the wall where the pilot holes are. The back of the photo ledge will be the 4 inch piece of wood. Glue it to the 3 inch piece of wood as seen in the photo below. You can build your shelves any length you wish. Picture ledge shelves are perfect for display purposes because they allow you specifically to draw attention to your favorite framed photos or decorations and to create a gallery wall that has style and personality.
How To Diy A 10 Long Art Ledge Angela Rose Home from angelarosehome.com Too funny, i just ordered a custom walnut picture ledge from an shop in maine, c/o etsy! Not to mention, the 4 foot long shelf from pottery barn is $59. The back of the photo ledge will be the 4 inch piece of wood. Drill pilot holes at the marked spots before drilling screws into the wall. It seemed simple enough and within budget. You can build your shelves any length you wish. Mark where your studs are located on the back board of your ledge. In this video i build two shelves for around $9.
And of course, all the times i googled this (image search) to make sure i'm getting the look i want, your living room picture was at the top.
Secure with several nails or wood screws. Use a level to make sure your photo ledge will be. You can even have your local lumber store cut the wood pieces to size if you don't have a power saw. This diy picture ledge tutorial is a quick and inexpensive project anyone can tackle. 1 x 2 was glued to the front of the 1 x 4. I see lots more picture ledge shelves in our future. Today i'm back with a quick and inexpensive diy project: Which sounds more complicated then it actually was, so please just refer to the picture below. Too funny, i just ordered a custom walnut picture ledge from an shop in maine, c/o etsy! You can also display small vases, special cutting boards, sentimental items, or anything else that will fit. It takes two 1x3s for every shelf, one for the apron (back) and one for the shelf. They are super easy to make out of the wooden planks with. To assemble my ledge, i used wood glue and glued 1 of the 1 x 2's onto the 1 x 4 and the second.
Learn how to build a picture ledge in just over one minute. One of my favorite things about the picture ledge shelves is how dang cheap you're able to build them for. I had a large blank wall going down my. Add a thin line of glue along the bottom edge of the 4 inch piece of wood. You can fill up the wall of your living that is right behind the big sofa with this elegant picture frame ledge and display a bunch of your memorable and cute photos on it and thus add oodles of charm and fun to your spaces and that too on your own.
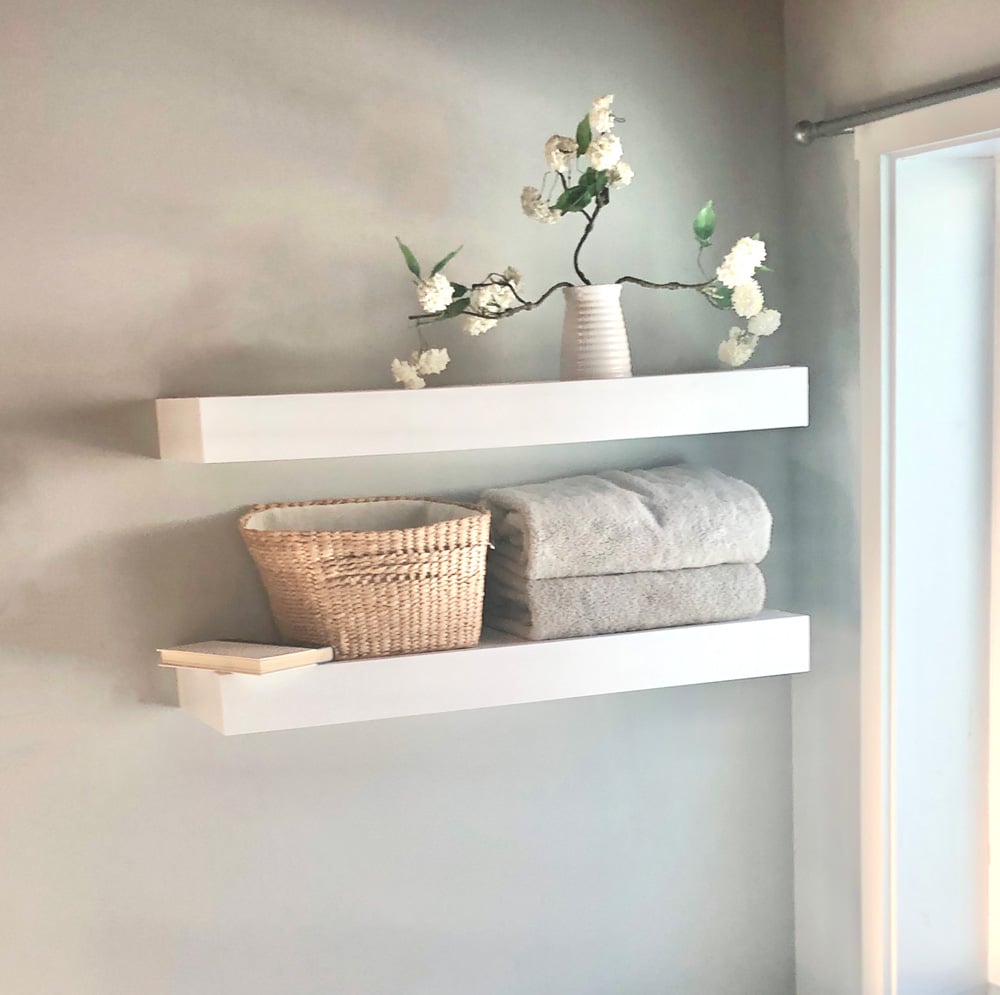
The Best Floating Shelves Ana White from ana-white.com This picture ledge is a very easy diy home decor project. The idea is great for spaces such as hallways, entryways or pretty much for any empty wall in the house. But first, a bit of its backstory. Mark where your studs are located on the back board of your ledge. To hang, locate the studs in the wall and drill directly through the back boards into the wall. The back of the photo ledge will be the 4 inch piece of wood. The ledges in my dining room cost me less than $20 for all of the materials! To assemble my ledge, i used wood glue and glued 1 of the 1 x 2's onto the 1 x 4 and the second.
You can even have your local lumber store cut the wood pieces to size if you don't have a power saw.
We brought our photo ledges with us to nashville, but the wall we were hanging them on was much too large for them. Apply wood glue to the back edge of board b and attach to the bottom front edge of board a. You can build your shelves any length you wish. I will walk you through making one diy picture ledge. Add a thin line of glue along the bottom edge of the 4 inch piece of wood. Three boards for each shelf you plan to make, cut to desired length of shelf (i.e. We needed 2 shelves that were 62 inches long. These costs are, of course, subject to change and may be different in your region. Glue it to the 3 inch piece of wood as seen in the photo below. I see lots more picture ledge shelves in our future. Total cost was about $11.00. The ledges in my dining room cost me less than $20 for all of the materials! You can even have your local lumber store cut the wood pieces to size if you don't have a power saw.